Metrology is the science of measurement. For land and engineering surveyors the term refers to high-precision measurements with sub-millimetre standard deviation, especially in the close-range industrial field.
Applications of metrologyMetrology is used mainly in industry and in specialised tasks including :
Technically, the aim is to provide measurement results which conform to the required accuracy, and to put in place the means, the methods and the checks necessary to achieve this. |
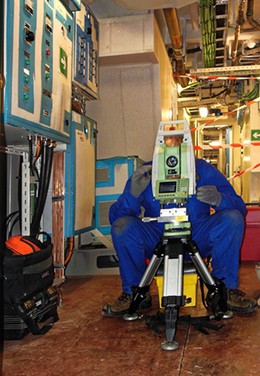
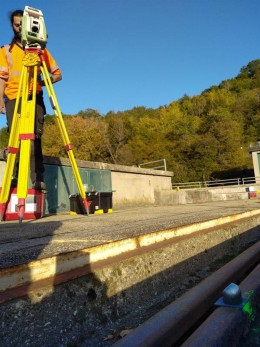
EquipmentThe Leica TS60 is a high-precision total station: 0.5" in angle and 0.6 mm + 1 ppm in distance, ensuring reliable measurements even under demanding conditions. Its robustness and performance make it ideal for applications requiring high precision. ATRplus technology enables fast, reliable locking onto the target, even in the event of environmental disturbances, improving the efficiency of measurement operations and productivity in the field. It operates in a temperature range from -20°C to +50°C, making it suitable for a wide range of climatic conditions.
Meanwhile, precise digital levels such as the Leica DNA03 can observe the vertical component of the position of a point with a precision on each sighting of 0.1 mm.
These are predominantly manufacturers’ figures. They are chiefly useful in determining the operating procedures which will draw the maximum benefit from the equipment in order to provide the best possible accuracy for the points surveyed. |
 |
 |
 |
Operating proceduresThe total stations which we use for high-precision work give better accuracy for angle measurements than for distances. Depending on the objects to be measured and the final accuracy required, it is therefore wise to organise the activity on site so as to minimise the impact of the measured distances on the final result. The observing network should be designed with the greatest possible care, bearing in mind that accuracy transverse to the line of sight is always superior to longitudinal accuracy. Upstream from the purely “field” aspects of the work, this also involves a dialogue with the end user of the survey. The objective is to understand the precise purpose of the metrology work. Another important point which will determine the eventual accuracy of the results is the number of repetitions of the observations : a quantity measured ten times sees its accuracy improved by a factor of √10 (systematic errors excluded). Because of this, repeated observations enable improved confidence intervals to be assigned to the measured values. To achieve reliable measurements one also needs to introduce redundancy into the network design. Redundancy is the term used when one carries out more observations than are strictly necessary to compute the geometric figure involved. In metrology redundancy is indispensable because the measurements must be reliable as well as precise ! A common example of metrology which we perform is the determination of attitude angles (heading, roll and pitch) between two sensors such as gyroscopes, gyrocompasses or inertial navigation systems on board ships. |
Computation softwareComputation parameters must perfectly model the measurement methods used, in conjunction with the manufacturer’s figures for the accuracy of the equipment. This then leaves no doubt about the validity of the results obtained. To bring such precise computations to a successful conclusion, the relative accuracy of the different measurements must be taken into account by weighting them individually in accordance with the relevant stochastic model. It is thus essential to know the standard deviations of observations for every instrument used and to check that sample measurements are in conformance with these. The tasks undertaken in metrology vary widely : for example the determination of attitudes of inertial equipment on ships in dock, the measurement of deformations of slabs for machine tools and the adjustment of alignment of components during manufacture and assembly of large industrial plant. The choice of computation software is as important as the activities on site. In some cases off-the-shelf survey software such as swisstopo’s LTOP may be suitable ; in others, only the development of an in-house solution will produce the desired result. This is why at TPLM-3D we have developed our own software such as TopTools. In view of the accuracies expected, advanced and sophisticated checks are required throughout the process. |
Wyler BlueLEVEL precision levels are high-precision electronic levels, capable of measuring angles with a resolution of 1 µm/m over a range of ±20 mm/m.
They are ideal for checking flatness, parallelism and squareness. Used in conjunction with WYLER software, they facilitate data analysis for complex measurements such as straightness and flatness.